Deli Menu
How to set up a Deli Menu
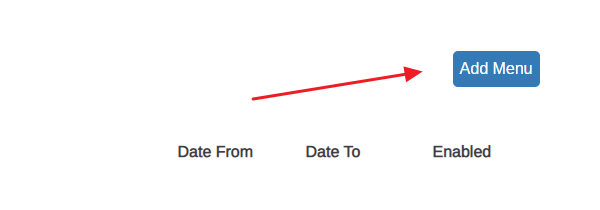
Go to Admin / Deli Menu

Click the Add Menu button - an interface to add a new menu will open
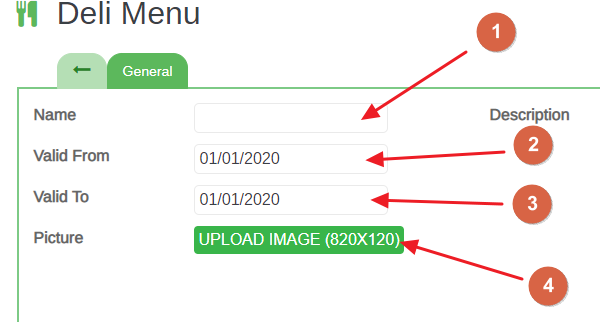
Enter the menu Name (1), Valid From (2) and Valid To (3) dates, upload a header image (4) (the correct image size will be indicated on the Upload Image button, and add an additional Description (5) for your menu if you’d like (to add some extra context or marketing text)

Click Save and Continue Edit to save your progress while staying on the same page
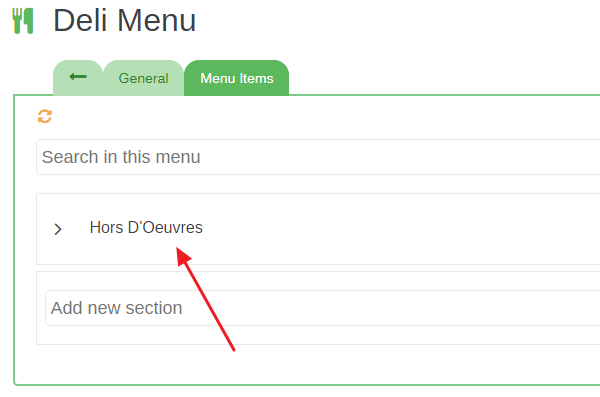
Once your menu is saved, select the Menu Items tab to proceed to the next stage - adding sections and items to the menu

Click on the Add New Section area, enter the name of the first menu section (for example, Entrees, Side Dishes, Hors D’Oeuvres, etc.), and hit the Enter key on your keyboard to save it

You have now created a new section. If you ever need to rename it, just click on the name, modify it, and hit the Enter key on your keyboard to save your changes
Click on the arrow icon next to the section name (1) and then start typing a name or an SKU of an item you’d like to add to that section (2).
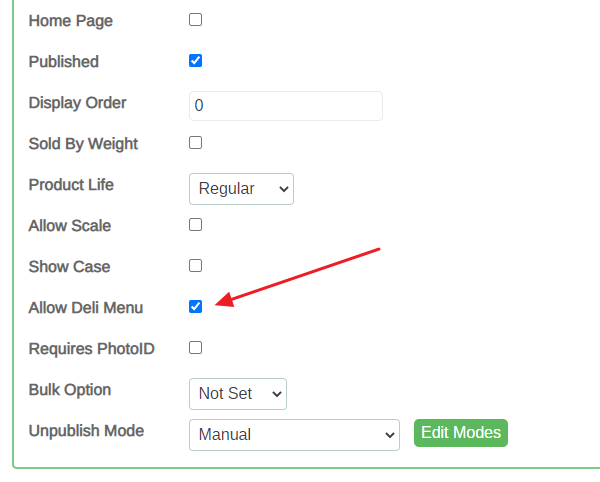
Please note: before adding items to the Deli Menu, you will need to first decide what categories should be available to choose from once you are building the menu, and you will need to select Allow Deli Menu in the Category settings - please refer to the Allow Deli Menu section at the end of this guide for instructions on how to do that
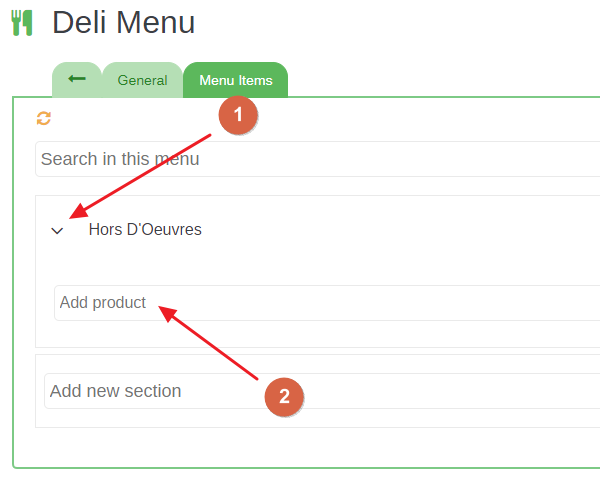
Once you find the item you’d like to add to the section, click on it, and it will be added automatically

Once you add the first item, you can keep adding additional items the same way - the Add Product field will be located underneath the item or items you have added

Once you are done adding all the needed sections and items, save your menu by clicking on the Save and Continue Edit button
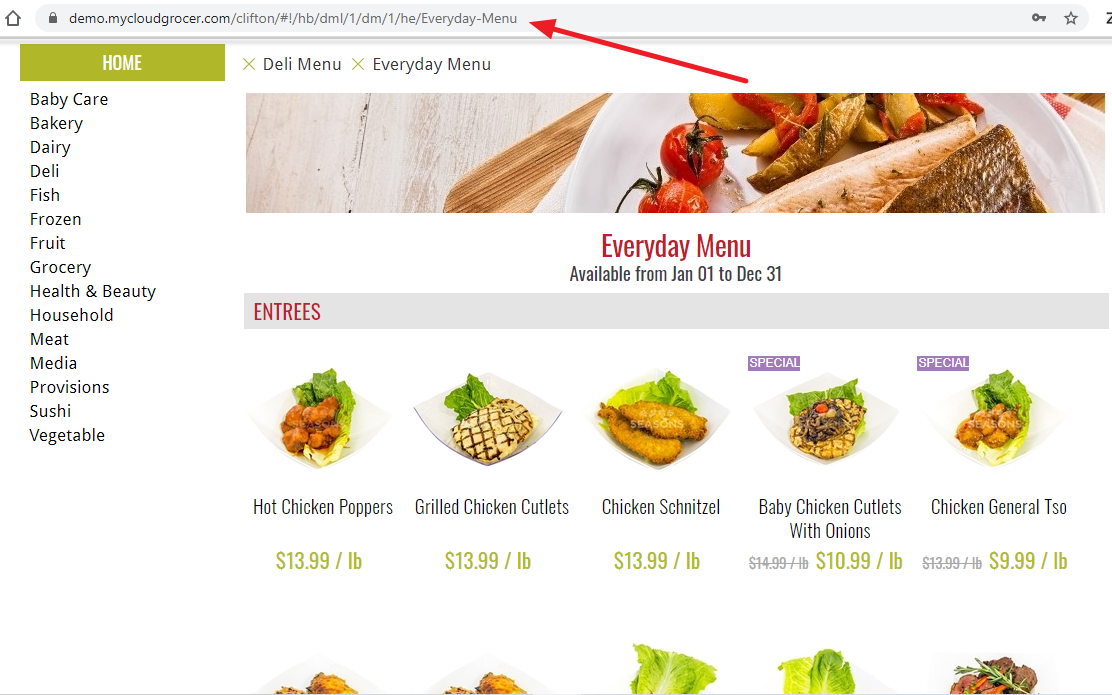
Click on the View button to see how the menu will be appearing to your customers

Once you view the customer version of the menu, you will be able to see the unique URL of that page. You can use that URL to share the menu via social media or mass-emailing, as well as to advertise it on the website itself via the home page slider and side banners
Allow Deli Menu - Instructions
Go to Admin / Categories
Find the category you’d like to allow deli menu for, and click on it
Scroll down to the Allow Deli Menu checkbox and check it off
Save your changes by clicking on the Save button on top of the page
Related Articles
How to set up a tax-exempt customer
1. Open the dropdown menu and select Customers 2. Locate the customer account you would like to make tax-exempt and select their email address to open their profile 3. Check off the Tax Exempt checkbox in the bottom right corner of the page (see ...How to set up User Roles on the website
1. Open the website's menu and select Admin / User Roles 2. Switch from All Employees to All customers 3. Select the customer you'd like to assign a role to - you can either select the customer from the list or search for the customer. ...How to Permanently Unpublish Items on the Website
Here is how to permanently unpublish items on the website using the DO NOT PUBLISH category: 1. Go to Admin / Categories. 2. Select "Unpublished" from the dropdown menu on the left, then locate the DO NOT PUBLISH category (or search for it if you ...Marking items "out of stock" in Personal Shopper
Whenever a Personal Shopper marks an item as out of stock, the website places that item into the Unpublish queue, but it does not unpublish it right away. Instead, there is a delay which we call the "grace period" - by default your grace period would ...